Difference between revisions of "SG Lab Exercises"
(→EXERCISE #4) |
(→EXERCISE #4) |
||
| Line 62: | Line 62: | ||
You should now see the license show up. [[FILE:License2.png]] | You should now see the license show up. [[FILE:License2.png]] | ||
| + | |||
| + | |||
| + | =='''EXERCISE #5'''== | ||
| + | Common Issue: One module will not start up using the UI Start or Restart buttons. | ||
| + | |||
| + | If you see this happen, you can stop all the modules from a prompt (kill the ones that are hung) and start them back up. | ||
| + | |||
| + | #) Open Putty to the Secure Messaging Gateway server and login as the gwava user. | ||
| + | #) To switch to root rights type: sudo su | ||
| + | #) Enter the password for the gwava user. Unless you changed it, it is: gwava | ||
| + | #) Change directories to /etc/init.d | ||
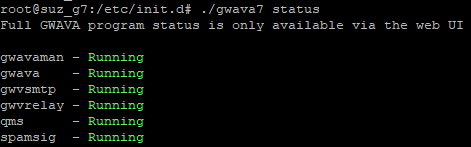
| + | #) To see which modules are currently running type: ./gwava7 status | ||
| + | #) Stop all the modules by typing: ./gwava7 stop | ||
| + | #) Check the status again to make sure everything is down: ./gwava7 status [[FILE:Status.png]] | ||
| + | #) If a module is still running, find the PID so you can kill it by typing: ps ax | grep gwava | ||
| + | #) Kill the PID that is hung by typing: kill -9 <PID> | ||
Revision as of 16:08, 4 October 2017
Contents |
EXERCISE #1
Issue: Web page won't load after setting up the ova file on VMware server.
Cause:
a) They didn't go through the GWAVA install? http://support.gwava.com/documentation/GWAVA/70/html/GWAVA_Installation.htm
- login as user: gwava
- run the following command: sudo /opt/gwavapreinstall.sh
b) If they have gone through the GWAVA install, check to see if there is a /opt/gwava directory that was installed. If there's not, then the install failed. This is usually because they can't get out to get the Ubuntu or Secure Gateway updates.
- ) Check the firewall, or a web filter they might be using, that might be blocking the connection.
- ) The DNS could be failing to resolve the hostnames for these updates as well, you could try using a public DNS server if that is the case.
- ) Run the install script again by typing: sudo /opt/gwavapreinstall.sh.complete
Note: Use putty so that you can scroll up to view the errors, if there are any. Such as:
"svn: E170013: Unable to connect to a repository at URL 'https://gwava7updates.gwava.com/update/gwava7/release'
svn: E670002: Name or service not known"
- ) If a different DNS is needed, while going through the install the second time, enter in a DNS that should resolve these, such as Google's 8.8.8.8 and 8.8.4.4.

EXERCISE #2
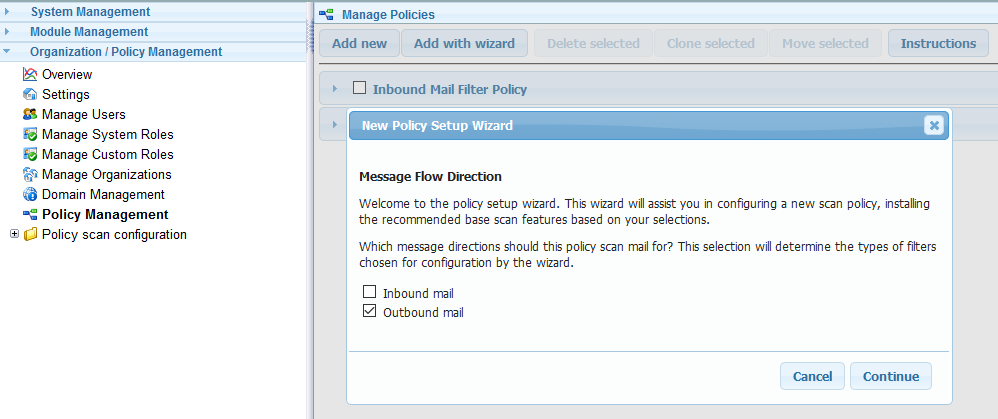
How do I prevent outbound email from getting scanned for anything but the Virus Filter Group: Anti-Virus, Zero Hour Virus, Fingerprinting, and Named Executables)?
- ) Set up a new policy using the wizard, selecting 'outbound' only.
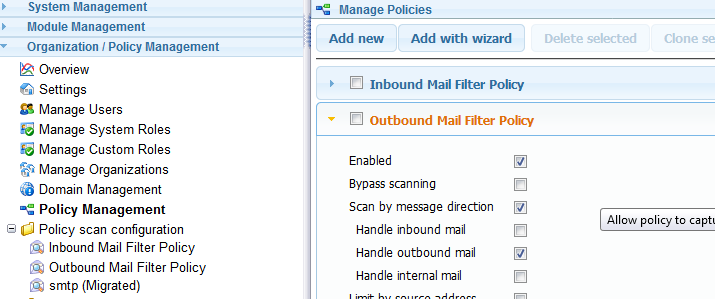
- ) Edit Outbound policy, under Policy management, ensuring that it has the following checked 'Enabled', 'Scan by message direction' and 'Handle outbound mail'
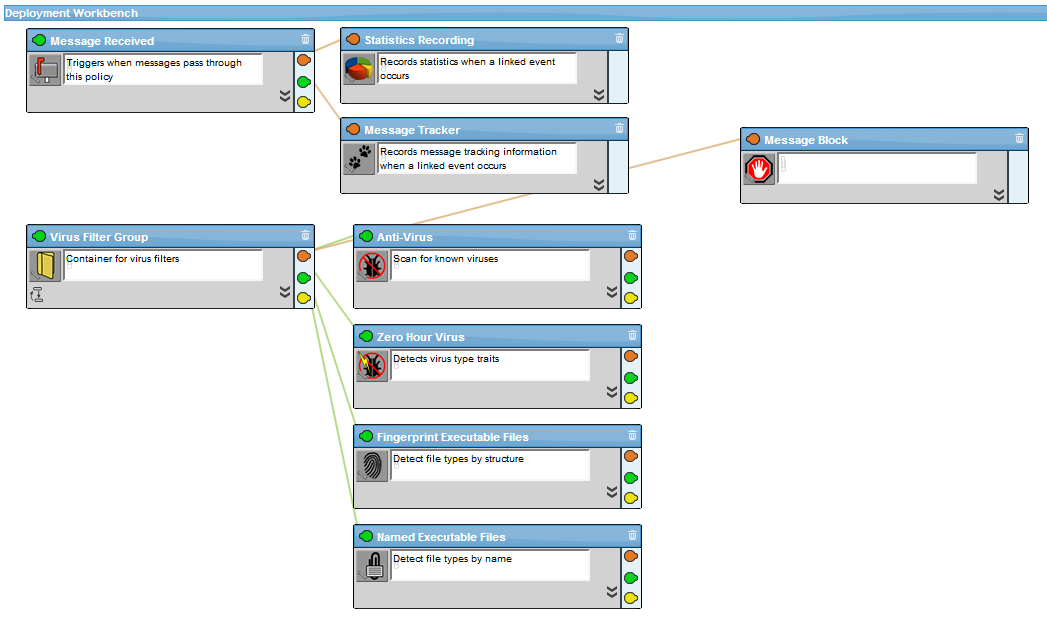
- ) On the workbench for the outbound policy, make sure you have the following:
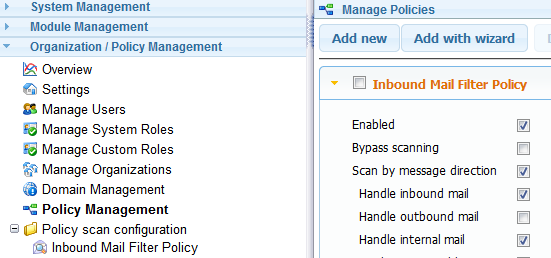
- ) Edit Inbound policy, under Policy management, uncheck 'Handle outbound mail'


Now Outbound email will only be scanned by the 'Outbound Mail Filter Policy'.
EXERCISE #3
Common issue: End user whitelist or blacklist is not working (not seeing the option in their QMS). Task: Set up end user whitelist or blacklist correctly.
- ) Add the box for the whitelist, under Exceptions to the workbench.
- ) Add the box for blacklist, under Filters to the workbench.
- ) Link the whitelist box to Spam Filter Group
- ) Link the blacklist box to Message Block service
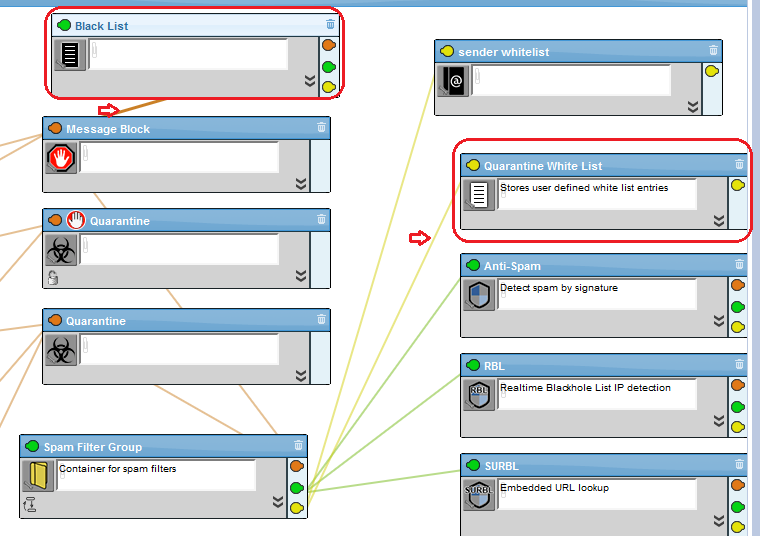
- ) Link the whitelist to the QMS by clicking on the "click to configure it and click on link to qms icon)
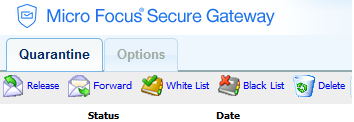
- ) Verify that the users have rights for the blacklist/whitelist. QMS as admin | settings | users rights | select which options you want users to have rights for.
- ) Login to the QMS as the user that you gave blacklist/whitelist rights to, in the step above. You should see the buttons for Whitelist and Blacklist.


EXERCISE #4
Common Issue: How to add the Secure Messaging Gateway License.
You will need the customer's Validation key and Customer ID (which is their email address). You can get this from licensing, if the customer does not have it.
- ) While logged in as admin to the System Management web page, go to System Management | Licensing.
- ) Click on Add License.
- ) Enter in the Customer ID (email address), and their Validation key. Supports license details are: Customer ID- corp@gwavanation.com Validation key- H7j3-d4f
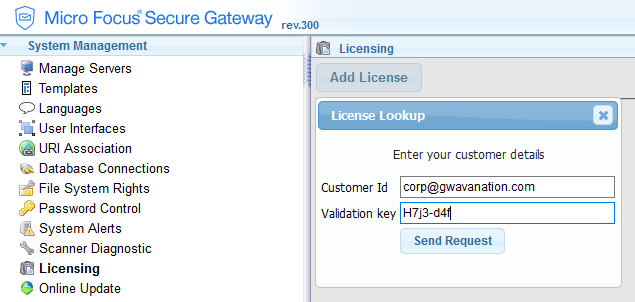
- ) Hit Send Request
- ) Click on the EULA agreement.
- ) Fill out the form to confirm details.
- ) Check the box that you have read and understand it.
- ) Click Accept.
- ) Check the box next to the license in the list.
- ) Click Intstall.

You should now see the license show up. ![]()
EXERCISE #5
Common Issue: One module will not start up using the UI Start or Restart buttons.
If you see this happen, you can stop all the modules from a prompt (kill the ones that are hung) and start them back up.
- ) Open Putty to the Secure Messaging Gateway server and login as the gwava user.
- ) To switch to root rights type: sudo su
- ) Enter the password for the gwava user. Unless you changed it, it is: gwava
- ) Change directories to /etc/init.d
- ) To see which modules are currently running type: ./gwava7 status
- ) Stop all the modules by typing: ./gwava7 stop
- ) Check the status again to make sure everything is down: ./gwava7 status
- ) If a module is still running, find the PID so you can kill it by typing: ps ax | grep gwava
- ) Kill the PID that is hung by typing: kill -9 <PID>
